So, today I’ve added some aero-bars to the bike. I’m fairly used to having them on the tri bike, and I figure they offer a bit more variation of position. They also mean I’m pushing less air around, although I think any benefits will be eaten up by the panniers. Anyway, I got a low cost pair of Profile Design Legacy II bars, and then addressed the problem of how to mount handle-bar bag, garmin mount, light and aero-bars on the same bike…
This is the result:
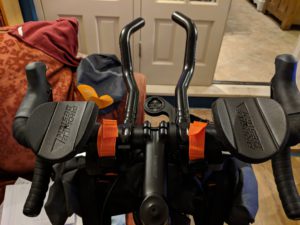

It’s worked OK I think, although it’s little cramped for the sitting up with hands on the horizontals position (like when you’re climbing a hill), but workable I think. From the photo it looks like the right one is higher than the left (and it IS a tiny bit) but not nearly so bad as it looks in the photo. I’ll have to sort that out on account of minor OCD…
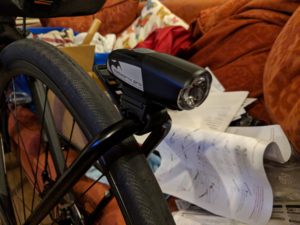
You’ll notice the light is missing if you look closely. Unfortunately I couldn’t swivel the mount and attach it to the aero-bars themselves, so instead I figured this might work….
Next job was to re-adjust all the gears, as I wasn’t happy with the way they were. Turns out this became a bit of mission for a couple of reasons… I didn’t have the instructions, and the front derailleur was a bit different to ones I’ve had before. Some time later, after much rummaging around on the (admittedly very thorough) Shimano website I managed to find the right Workshop Manuals for my particular version of the derailleurs. In case you are wondering what a front derailleur is, this is it here (the bit above the thing with teeth). It’s responsible for moving the chain between the small ring (up hill) and the big ring (down hill).
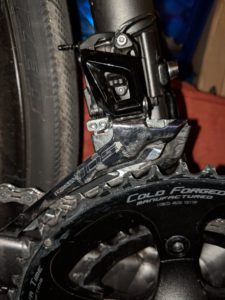

It turns out it’s not all that different from any other, but a couple of things caught me out. One is that it has an extra adjustment (top right) that I couldn’t for the life of me figure out. Turns out it was a cable tension adjuster (in addition to the one inline on the cable). The other thing which was new to me was the method, which was different due to the fact this 105 set has trim adjustment, which I didn’t even know existed. This is a handy feature that allows you to trim the position of the front derailleur from the shifters to allow for use of the full rear cassette without the derailleur rubbing on the chain. The setup of the stop positions for the derailleur was based on these trim positions. Anyway… I learnt something today 🙂
The rear mech (or derailleur if you like) was pretty standard, and the setup familiar. For those who are interested, that’s this bit. It’s the black and silver bit at the bottom, below the toothy bit, with a cable attached. It’s job is to move the chain between the 11 cogs (circles of teeth) at the back of the bike. The smallest cog (nearest) is for going fast, the biggest/furthest away is for going up hills.
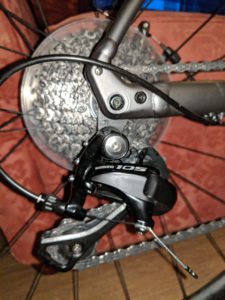
Setup is straightforward. You set the inner and outer limits of movement with a couple of screws (so that the mech doesn’t go into the wheel, and it aligned with the biggest or smallest cogs), then adjust the tension so the chain is under the right tension and the mech doesn’t snarl the largest gear/cog. There is then the SIS adjustment which aligns the shifter to the mech (so you get exactly one gear each click), that involves clicking the shifter once up from the smallest cog and adjusting so it just falls back to the second smallest cog from the third. It’s easier to do than explain!
By the time I’d finished all this, and had something quick to eat, was a bit dark for a bike ride, which was a shame… but at least tomorrow I’ll have slick gear changes.
I’ll leave the brake adjustment for another day, as I want to learn how to replace the brake pads before I need to!